Declutter Paperwork Fast: Tips for an Organized Space
We all know how paperwork can pile up and turn our desks, drawers, and countertops into a bit of a mess! Whether it’s bills, receipts, or old documents, decluttering paperwork can be a real challenge for many of us. But I am here to show you that you can tackle that paper chaos with some organization and the right approach and create a system that works perfectly for you.
Here’s my step-by-step guide to help you take control of those paper piles once and for all!
Decluttering Paperwork in Your Home
I don’t know about you, but paper clutter can be really stressful for me! Seeing piles of paperwork at home or work makes me feel like I might be missing something important, and it can sit with me. My go-to strategy is to tackle any new papers as soon as they arrive. Of course, there are some things that I can only handle later, but I’ve got a system for that, too!
In my home office makeover, I’ve created a cozy and organized workspace that really helps me stay productive! It’s incredible how much better you can focus when there’s no paper clutter. If you’re looking to boost your productivity, I definitely recommend starting with decluttering your paperwork. You’ll feel so much more motivated in a tidy space!


Before we dive in and tackle this type of decluttering project, it’s so important to have a handle on the paperwork that regularly comes into your home. Once we get that sorted and organized, you’ll find there’s much less to deal with down the road! So, let’s take that first step together and make things easier!
How to Reduce the Amount of Paper Coming Into Your Home
Keeping a tidy home is so much easier when you take a little time to reduce the flow of things coming in!
Here are actionable tips to help you get started:
- Paperless Billing: Switch to digital statements and bills for utilities, credit cards, and other services.
- Say No to Receipts: Decline printed receipts and opt for email or text versions when possible.
- Digitize Notes: Use apps like Evernote or Microsoft OneNote to jot down ideas instead of sticky notes or notebooks. This is my husband’s idea; I still love my notebooks!
- Cancel Magazine Subscriptions: Switch to the digital version or cancel subscriptions you no longer read.
- Recycle Immediately: Place a recycling bin near your mail area or office to quickly discard unnecessary papers.
- Be Mindful of Flyers and Handouts: Politely decline paper handouts or flyers unless necessary.
A Step-by-Step System for Decluttering Paperwork
Follow my simple step-by-step process to help you create a system that works for you.
Step 1: Gather All Your Paperwork
Start by collecting all the paperwork scattered around your home or workspace. This includes mail, receipts, kids’ school papers, bills, magazines, and any loose documents. Place each piece of paper in one central location so you can start to start to sort, declutter, and organize.
Step 2: Sort the Paperwork Into Six Categories
Organizing your paperwork can feel like a big task, but sorting it into these six categories makes it much easier! Take each piece of paper and put it into one of the following categories:
1. Action Items:
These documents require immediate attention, such as bills to pay, forms to complete, or invitations to respond to. Use a designated tray or folder for these items and review them daily or weekly to ensure nothing gets overlooked.
2. documents to File:
Documents you need to keep for future reference, like tax records, warranties, or insurance policies. If this pile starts to get out of hand, create subcategories such as:
- Financial: Include bank statements, tax documents, and receipts for major purchases.
- Home: Store warranties, appliance manuals, and home improvement records.
- Medical: Organize health records, prescriptions, and insurance claims.
- Personal: Keep certificates, resumes, and school records here.
3. Paper to Shred:
Papers containing sensitive information, like old bank statements or documents with personal information, should be shredded to protect your privacy.
4. Paper to Recycle:
This would include non-sensitive papers such as junk mail, old newspapers, or flyers.
5. Reference Materials:
Some documents, such as school schedules, meal plans, or event calendars, don’t require filing, but it is helpful to keep them.
6. Temporary Papers:
Items like recent receipts, event tickets, or notes.
Step 3: Create a Filing System
Creating a filing system is the foundation of decluttering and organizing your paperwork.
This post contains affiliate links; see disclosure for more information.
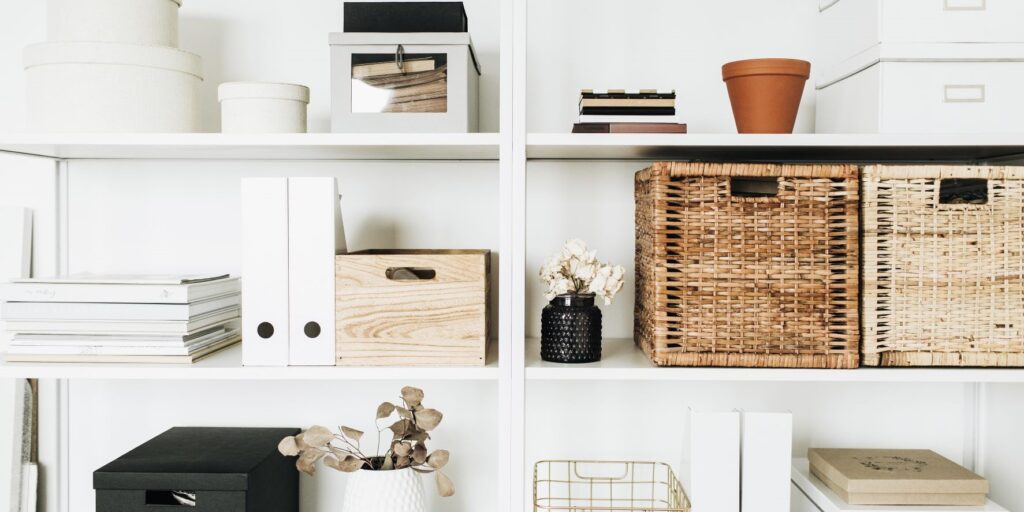
- Choose Your Storage Solution: Decide whether you’ll use a filing cabinet, desktop organizer, binders, or portable accordion folders based on your space and needs.
- Label Clearly: Use clear, specific labels for each category. You can use a label maker or handwritten labels.
- Color-Code Your Files: Assign different colors to categories for quick identification. For example, green is for financial documents, blue is for medical records, and yellow is for home-related paperwork. You chose your colors.
- Create Subcategories: Break down large categories into smaller sections. For example, instead of one financial folder, use separate folders for utility companies, bank statements, credit cards, tax returns, investment records, etc.
- Use File Tabs: Try file tabs that extend above the folder so you can see them easily.
- Sort Chronologically: For most document files, you can arrange your paperwork by date, with the most recent on top for easy access.
- Add a Filing Routine: Dedicate a specific day each week or month to update and file away new documents. Regular upkeep prevents clutter.
- Store Important Documents Separately: Keep critical documents like birth certificates, passports, wills, and deeds in a fireproof, waterproof safe for added security.
Paper Clutter Organizers
Step 4: Go Digital When Possible
Digitizing your documents is a powerful way to reduce paper clutter and streamline your organization. Here are just a few suggestions for trying out this process before going all in.

1. Choose the Right Tools:
- Scanner: Invest in a high-quality scanner for clear and reliable digital copies. Many multifunction printers also include scanning features.
- Apps: Use apps like Adobe Scan to digitize documents directly from your smartphone.
- Cloud Storage Services: Options like Google Drive, Dropbox, or OneDrive provide secure and accessible storage solutions.
2. Create a Digital Folder Structure:
Organize digital files using a system similar to your physical filing system.
- Main Folders: Financial, Medical, Home, Personal.
- Subfolders: Break down large categories into specifics, such as “2025 Taxes” under Financial or “Prescriptions” under Medical.
- Use clear and descriptive folder names to make files easy to locate.
3. Standardize File Naming:
Develop a consistent way to name your files. I like to include an underscore instead of a dash, a filing system I borrowed from my cousin. This is yours to create, but I like to use this system:
- 2025_InsurancePolicy_House.pdf
- 2025_NBPower_January.pdf
- 2025_01_01_Prescription_Cheryl
4. Digitize Strategically:
If you are just starting to go digital, start with the most important or frequently used documents like:
- Tax records
- Medical history
- Receipts for large purchases
- Contracts and Warranties
Gradually digitize less critical papers over time to avoid feeling overwhelmed by the changeover process.
5. Back Up Your Files:
- Use at least two backup methods for added security:
- We use an external hard drive for physical backups.
- Cloud storage is our remote and accessible backup.
- Schedule regular backups to keep your files current.
Step 5: Set Up an Incoming Paper System
Prevent future clutter by creating a detailed, step-by-step paper organization system for managing incoming papers. Here’s how my simple steps will help you stay ahead of the mess:
Designate a Collection Spot:
Place a tray, basket, or wall-mounted organizer near the entryway or main workspace to collect incoming mail, bills, or documents. If you have more than one or two people in your household, label the spot clearly as “Incoming Papers” to ensure everyone knows where to put new paperwork.
Daily Sorting Routine:
It only takes 5-10 minutes daily to go through the collection spot. Use the same system we did initially to clean up your existing papers. Sort papers immediately into categories:
- Action Items: Bills to pay, forms to complete, or invitations to RSVP.
- To File: Papers that need to be stored for future reference.
- Shred: Sensitive papers you no longer need.
- Recycle: Junk mail, flyers, or newspapers.
Create Action Folders:
Create labeled folders for the action items and store them in a desktop organizer for easy access:
- Bills to Pay: Keep all unpaid bills together.
- To Review this Week: For documents that require further attention.
- Pending: Forms or invitations waiting for completion.
Set Up a Weekly Review Schedule
Dedicate time once a week to address all action items:
- Pay bills.
- Respond to invitations or forms.
- File completed paperwork in the appropriate folder or digital location.
Maintain a Shred-and-Recycle Zone
Place a paper shredder and recycling bin next to the incoming paper spot. Immediately shred documents with sensitive information. Toss non-sensitive papers like junk mail into the recycling bin.
Audit and Declutter Paperwork Monthly
Go through the entire system at the end of each month. Reassess what’s in your files and discard outdated or unnecessary papers.
Step 6: Schedule Regular Maintenance
Make a new habit of reviewing your paperwork regularly. As mentioned above, you want to dedicate weekly or monthly time to process new papers and declutter them as needed. Consistent maintenance prevents clutter from building up again.
General Guidelines on What Paper to Keep
- Tax Documents: Keep for at least 7 years.
- Financial Records: Bank statements and investment documents should be kept for 1-7 years, depending on their purpose.
- Medical Records: Keep indefinitely or as long as needed for reference.
- Legal Documents: Keep important documents such as wills, deeds, and contracts permanently.
- Insurance Policies: Retain for the life of the policy and update as needed.
- Receipts: Keep receipts for major purchases, warranties, or tax purposes as long as they are relevant.
- Home Documents: Maintain records for home improvements and ownership as long as you own the property.
- Sentimental Items: Preserve irreplaceable items like handwritten letters, children’s artwork, greeting cards, or other documents with emotional value. You can consider scanning some of these items to preserve the memory without taking up space.
Tips for Staying Organized and Decluttering Paperwork
- Form Simple Habits: Use my free habit tracker to help you form habits for decluttering paper .
- Go Paperless: Opt for digital statements and bills whenever possible.
- Use a Planner: Keep track of important dates and deadlines in a physical or digital planner to reduce paper reminders.
- Declutter Annually: Review and clean outdated files once a year.
These simple strategies will help you change your paper clutter problem into a manageable, organized system. Not only will this save you time and stress, but it will also create a more serene and efficient home and workspace.
Ready to tackle your paper clutter? Let me know your favorite tips for managing paperwork in the comments below!

Hey there, I’m Cheryl
I’m a proud mom, wife, business professional, and Maritimer who loves decorating and organization. From daily essentials to interior design, join me as I share my next project, plan, or tutorial. Using simple planning and organization strategies, I love to help folks like you bring more beauty and harmony into your lives and living spaces.
Feeling overwhelmed or short on time? Decluttering and organizing your home can lead to a more calm, efficient environment that frees up both time and energy. Dive into these step-by-step guides to create a balanced and harmonious space that truly supports your lifestyle. Let’s keep organizing simple and transformative!
Don’t forget to pin this for later!


